
If you love the satisfying crunch of crumb-coated foods, you’re not alone. From chicken to fish to vegetables, there are countless ways to add a crispy, flavourful coating to your favourite dishes.
But what exactly is crumbing, and how can you achieve the perfect texture and flavour? This guide has all the tips and tricks you need to become a crumb-coating pro.
The Delicious World of Crumbing Food: A Comprehensive Guide
Are you a fan of crumb-coated foods?
This guide has everything you need to know about crumbing food, from different types of crumbs to techniques for achieving the perfect crunch.
Crumbing of seafood, chicken, fish, cutlets, chops and sausages are all popular.
What is crumbing food?
The term “crumbing” also known as breading is the process of coating food in a layer of breadcrumbs or other types of crumbs before cooking.
This technique is used to add flavour, texture, and visual appeal to dishes.
Crumbing can be done using a variety of ingredients, including panko breadcrumbs, seasoned flour, crushed crackers and even crushed breakfast cereals.
The type of crumb used can affect the final flavour and texture of the dish, so it’s important to choose the right one for your recipe.
10 Types of Crumbs You Need to Try for Perfect Breading
Looking for new ways to add flavour and texture to your crumbing?
Check out these 10 types of crumbs that will take your dishes to the next level.
There are many types of crumbs that can be used for crumbing food, each with its own unique flavour and texture.
Remember, it’s important to choose the right type of crumb for your recipe to achieve the desired flavour and texture.
- Plain breadcrumbs;
Plain breadcrumbs are the most common type of breadcrumbs used for breading.
They are made from dried and ground bread without any added flavours or seasonings.They are perfect for creating a neutral base for breading and can be used for a variety of dishes.
- Panko breadcrumbs;
Panko breadcrumbs are a type of Japanese breadcrumb that is lighter and flakier than traditional breadcrumbs.
They are made from crustless bread that is processed into large flakes.Panko breadcrumbs are perfect for creating a crispy texture and are commonly used for fried foods.
- Seasoned breadcrumbs;
Seasoned breadcrumbs are plain breadcrumbs that have been mixed with herbs, spices, and other seasonings.They are perfect for adding flavour to your breading and can be used for a variety of dishes.
Some common seasonings used in seasoned breadcrumbs include garlic, onion, parsley, and paprika.
- Italian breadcrumbs;
Italian breadcrumbs are seasoned breadcrumbs that have been mixed with Italian herbs and spices.They are perfect for creating an Italian-style breading and can be used for dishes such as chicken parmesan and meatballs.
- Gluten-free breadcrumbs;
Gluten-free breadcrumbs are made from gluten-free bread and are perfect for those who have a gluten intolerance or allergy.They can be used in the same way as traditional breadcrumbs and are available in plain and seasoned varieties.
- Whole wheat breadcrumbs;
Whole wheat breadcrumbs are made from whole wheat bread and are a healthier alternative to traditional breadcrumbs.They are perfect for adding a nutty flavour to your breading and can be used for a variety of dishes.
- Cornmeal breadcrumbs;
Cornmeal breadcrumbs are made from a mixture of cornmeal and breadcrumbs.They are perfect for creating a crispy texture and are commonly used for fried foods such as fried chicken and fish. Cornmeal breadcrumbs can also be used as a coating for vegetables such as zucchini and eggplant.
- Crushed Crackers;
Crushed crackers are a simple and easy option for breading.
They are made by crushing crackers like saltines or Ritz crackers into small pieces.Crushed crackers create a crispy texture and add a salty flavour to any dish.
They are perfect for breading chicken, fish, or vegetables.
- Crushed Cornflakes;
Crushed Cornflakes make a great breading because they are crispy, crunchy, and have a neutral flavour that won’t overpower the food you’re coating.
They are made by crushing cornflakes into small pieces.They also have a unique texture that creates a nice crunch when fried or baked.
Additionally, cornflakes are a great alternative to traditional bread crumbs for those who are gluten-free or looking for a healthier option.
- Crushed Rice Bubbles;
Rice bubbles, also known as Rice Krispies, make a great breading because they are light and crispy, which creates a nice texture on fried or baked foods.
They are made by crushing rice bubbles into small pieces.They also add a subtle flavour that complements many dishes.
Additionally, they are gluten-free, making them a great option for those with dietary restrictions.
Egg-Free Crumbing: Tips and Tricks for Delicious Results
Don’t let an egg allergy stop you from enjoying crispy, crunchy crumbed dishes!
Discover our top substitutes, tips and tricks for egg-free crumbing that still delivers delicious results.
Whether you’re vegan, allergic to eggs, or simply looking for a healthier alternative, our guide to crumbing without egg has got you covered.
Get ready to enjoy your favourite dishes with a crispy, crunchy coating!
- Use milk or yoghurt:
Instead of using eggs, you can use milk or yohgurt to create a binding agent for your crumb coating.Simply dip your food item in milk or yogurt before coating it in breadcrumbs.
- Use mustard:
Mustard can also be used as a binding agent for your crumb coating.Simply brush your food item with mustard before coating it in breadcrumbs.
- Use oil:
You can also use oil to help the breadcrumbs stick to your food item.Brush your food item with oil before coating it in breadcrumbs.
- Use mashed potatoes:
Runny mashed Potatoes can be used as a binding agent for your crumb coating.Simply dip your food item in mashed potatoes before coating it in breadcrumbs.
- Use cornstarch:
Cornstarch can also be used as a binding agent for your crumb coating.Mix cornstarch with water to create a paste and use it to coat your food item before dipping it in breadcrumbs.
- Use honey:
Honey can be used as a binding agent for sweet crumb coatings.Simply brush your food item with honey before coating it in breadcrumbs or crushed nuts.
Understanding the Different Types of Flour Used for Crumbing
Want to take your breading game to the next level?
Understanding the different types of flour used for breading is key. This section breaks it down for you.
Learn about the different types of flour used for crumbing and how to use them effectively
- Plain (All-Purpose Flour):
Plain flour is the most commonly used flour for crumbing.
It is made from a blend of hard and soft wheat and has a moderate protein content.This flour creates a light and crispy coating when used for breading.
- Self-Rising Flour:
Self-rising flour is a type of flour that has baking powder and salt already added to it.It is commonly used in deep frying or Southern-style cooking and creates a slightly thicker and crunchier coating than plain flour.
- Cornmeal:
Cornmeal is a coarse flour made from ground corn.It is commonly used in deep frying or Southern-style cooking and creates a crunchy and slightly sweet coating when used for breading.
- Rice Flour:
Rice flour is a gluten-free flour made from ground rice.It creates a light and crispy coating when used for breading and is commonly used in gluten-free cooking.
- Almond Flour:
Almond flour is a gluten-free flour made from ground almonds.It creates a nutty and slightly sweet coating when used for breading and is commonly used in low-carb and gluten-free cooking.
- Coconut Flour:
Coconut flour is a gluten-free flour made from ground coconut meat.It creates a slightly sweet and nutty coating when used for breading and is commonly used in low-carb and gluten-free cooking.
Gluten-Free Crumbing Made Easy: Tips and Tricks
Say goodbye to bland gluten-free meals with our guide to gluten-free crumbing.
Learn how to make your dishes crispy and flavourful.
If you are following a gluten free, here are some easy breading options.
- Use gluten-free bread crumbs:
The easiest way to make gluten-free crumbing is to use gluten-free bread crumbs.
You can find them at most grocery stores or make your own by toasting gluten-free bread and blending it into crumbs.These can be used in any recipe that calls for bread crumbs.
- Use gluten-free flour:
Another option is to use gluten-free flour as a coating for your food.You can use rice flour, corn flour, or a gluten-free plain flour.
This works well for coating chicken, fish, or vegetables before frying or baking.
- Use gluten-free oats:
If you’re making a recipe that calls for oats, make sure to use gluten-free oats.Regular oats can be contaminated with gluten during processing, so it’s important to look for certified gluten-free oats.
You can use them to make a gluten-free crumb coating for chicken or fish.
- Use ground nuts or seeds:
Ground nuts or seeds can also be used as a gluten-free crumb coating. Almonds, pecans, and sunflower seeds are all good options.Simply grind them in a food processor or blender until they are fine crumbs and use them to coat your food before cooking.
- Use gluten-free cereal:
Gluten-free cereal can also be used as a crumb coating.Corn flakes, rice bubbles, and gluten-free Chex cereal can all be crushed and used as a coating for chicken or fish.
- Use gluten-free crackers:
Gluten-free crackers can be crushed and used as a crumb coating for chicken or fish.Look for crackers that are made with gluten-free ingredients like rice flour or corn flour.
- Use gluten-free panko:
Gluten-free panko is a Japanese-style breadcrumb that is made with rice flour instead of wheat flour.It can be used as a coating for chicken, fish, or vegetables before frying or baking.
Look for gluten-free panko at specialty grocery stores or online.
Tips for coating different types of food.
Coating different types of food requires different techniques to achieve the perfect crunch.
For example, for meat or fish, it’s important to pat the surface dry before coating to ensure the crumbs stick.
For vegetables, it’s best to blanch them first to soften them slightly and help the crumbs adhere. And for delicate foods like shrimp or scallops, it’s important to handle them gently and use a light touch when coating to avoid breaking them apart.
5 Reasons Why the Bread Keeps Falling Off
- You Don’t Start Dry.
The first step to crumbing is crucial; make sure the is completely dry before starting the dredging process.
Using a paper towel, pat the food dry on all sides.Excess moisture will cause the flour to get soggy and thus will not adhere properly to the food.
- Always Shake the Flour off.
Be sure to shake off any excess flour on the food.
Excess flour will create a coating that prevents the egg mixture from sticking on to the food.
This will ultimately stop the crumbs from sticking properly.For crispy, flavourful crumbed food, make sure to remove any excess flour before proceeding.
- Skimping on the Crumb.
Whatever you coat the chicken in, make sure to do so thoroughly.
No matter what type of crumb you use, coat the meat evenly and completely on every side. - Forgetting the Last Pat.
After you’ve covered the meat in breading, pat it down gently on all sides so that every piece sticks to the egg layer.Well-coated food is the key to the crunch, so make sure the breading is patted down before cooking.
- Give Plenty of Room.
If you’re frying, grilling/broiling, baking or barbecuing, place them with plenty of space in between—and let them be!If the foods are touching each other, the more likely the breading is to come off.
- Being Impatient.
The more you touch the food with tongs, the more likely the breading is to fall off.Be cautious not to touch or turn the chicken too much.
The key here is to be patient. As soon as you see a golden rim appear around the side of the food that is submerged in oil, feel free to flip it.The same goes for baking or grilling/broiling, give them space, flip them once, then it’s hands off.
Creative ways to use crumbed food in recipes.
Crumbed food is not just limited to the classic fried chicken or fish and chips.
There are many creative ways to incorporate crumbed food into your recipes.
For example –
- Topping for casseroles;
Crumbed food, such as breadcrumbs or crushed crackers, can be used as a delicious topping for casseroles.
Simply sprinkle the crumbs over the top of the casserole before baking for a crispy, flavourful finish. - Coating for fried foods;
Crumbed food is perfect for coating fried foods like Chicken, Lamb chops, Pork chops, Schnitzels or fish.Dip the food in beaten egg, then coat with the crumbs before frying for a crispy, crunchy texture.
- Meatloaf binder;
Crumbed food can be used as a binder in meatloaf recipes.Mix the crumbs with minced (ground meat), eggs, and other ingredients to help hold the meatloaf together while it bakes.
- Stuffing for vegetables;
Crumbed food can be used as a delicious stuffing for vegetables like peppers or mushrooms.Mix the crumbs with cheese, herbs, and other ingredients, then stuff the mixture into the vegetables before baking.
- Topping for mac and cheese;
Crumbed food can be used as a tasty topping for mac and cheese.Mix the crumbs with butter and sprinkle over the top of the mac and cheese before baking for a crispy, cheesy finish.
- Coating for baked goods;
Crumbed food can be used as a coating for baked goods like chicken tenders or onion rings.
Mix the crumbs with spices and other seasonings, then coat the food before baking for a crispy, flavourful finish. - Filling for savoury pies;
Crumbed food can be used as a delicious filling for savoury pies.Mix the crumbs with cooked vegetables, cheese, and other ingredients, then bake in a pie crust for a tasty and satisfying meal.
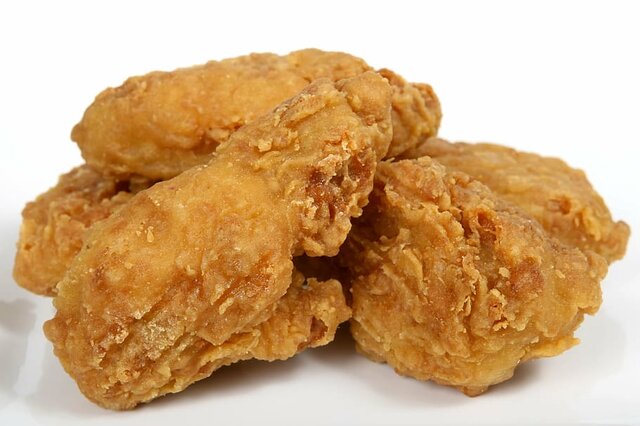
How to Crumb Chicken: A Step-by-Step Guide
This guide will show you how to crumb chicken in just a few simple steps.
Ingredients
- ½ cup plain/all-purpose flour
- 1 beaten egg
- 1 cup of breadcrumbs
- 1 Chicken Fillet
Instructions
- Prepare the chicken:
Start with boneless, skinless chicken breasts. Cut them into even pieces, about 2.5 cm (1 inch thick.) - Prepare the coating:
Prepare three bowls, one with flour, one with beaten eggs, and one with breadcrumbs.
Season the flour and breadcrumbs with salt, pepper, and any other desired seasonings. - Dredge the chicken:
Dredge each piece of chicken in the flour, shaking off any excess. - Dip the chicken:
Dip the chicken in the beaten eggs, making sure it is fully coated. - Cover the chicken in breadcrumbs:
Roll the chicken in the breadcrumbs, pressing the breadcrumbs onto the chicken to ensure they stick.
Repeat until all chicken pieces are breaded. - Rest the Chicken:
To ensure that the breadcrumbs stick to your chicken during cooking, it's important to let it rest in the fridge for a few minutes after crumbing.
While a few minutes will do the trick, it's recommended to let it rest for at least 30 minutes.
This will allow the breadcrumbs to adhere to the chicken and prevent them from falling off while cooking. - Baking the chicken:
Place the breaded chicken on a baking sheet lined with parchment paper.
Bake the chicken in a preheated oven at 200°C (400°F) for 20-25 minutes, or until the chicken is cooked through and the breadcrumbs are golden brown. - Pan frying the chicken:
Heat a skillet over medium-high heat and add oil. Once the oil is hot, add the chicken pieces and cook for 3-4 minutes on each side, or until golden brown and cooked through. - Serve and enjoy:
Serve hot and enjoy your perfectly crumbed chicken!
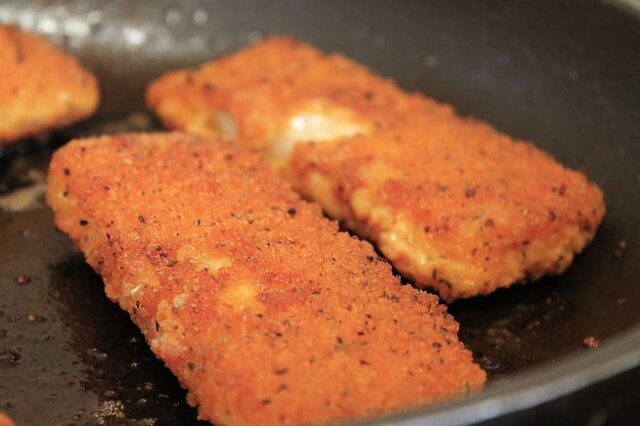
Step-by-Step: How to Crumb Fish for a Delicious Meal
This guide will show you how to crumb fish in just a few simple steps.
Ingredients
- ½ cup plain/all-purpose flour
- 1 beaten egg
- 1 cup of breadcrumbs
- 1 Fish Fillet
Instructions
- Choose the right fish:
When it comes to crumbing fish, it's important to choose a firm, white fish that won't fall apart during the crumbing process.
Good options include flathead, whiting, hake, barramundi, flake, snapper, tarakihi, gurnard, trevally, cod, haddock, and tilapia. - Prepare the fish:
Before crumbing, make sure to pat the fish dry with a paper towel to remove any excess moisture.
This will help the crumb mixture stick better. - Set up a crumbing station:
To crumb your fish, you will need a crumbing station.
This should include three shallow dishes: one with flour, one with beaten eggs, and one with breadcrumbs. - Prepare the crumb mixture:
To make the crumb mixture, combine breadcrumbs with your choice of seasonings.
Common options include salt, pepper, garlic powder, and paprika.
You can also add grated Parmesan cheese for extra flavour. - Coat the fish:
Dip each piece of fish into a beaten egg mixture, then coat it in the crumb mixture.
Make sure to press the crumbs onto the fish to ensure they stick. - Rest the Fish:
After coating your fish fillet in breadcrumbs, it's important to let it rest in the refrigerator for a few minutes before cooking.
For best results, allow it to rest for at least 30 minutes.
This resting period helps the breadcrumbs stick to the fish and prevents them from falling off during cooking. - Baking the fish:
To Bake, preheat the oven to 200°C (400°F) and place the fish on a baking sheet lined with parchment paper.
Bake for 15-20 minutes, or until the fish is cooked through and the crumbs are golden brown. - Pan frying the fish:
Heat a skillet over medium-high heat and add oil. Once the oil is hot, add the chicken pieces and cook for 3-4 minutes on each side, or until golden brown and cooked through. - Serve and enjoy:
Once the fish is cooked, serve it with your choice of sides, such as roasted vegetables or a salad. Enjoy your delicious, crispy crumbed fish!
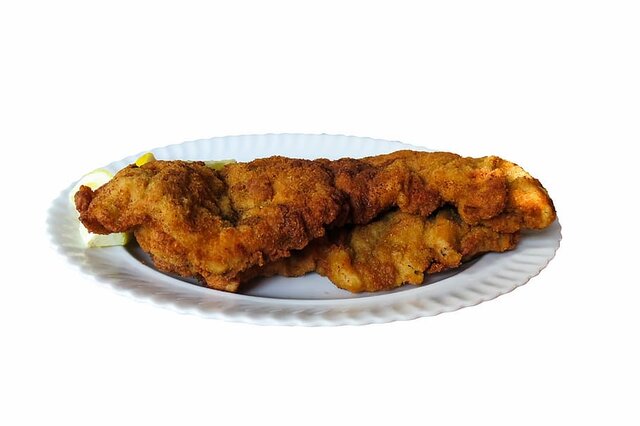
How to Crumb Schnitzel Like a Pro: A Step-by-Step Guide
This step-by-step guide will show you how to make perfect schnitzel every time.
Ingredients
- ½ cup plain/all-purpose flour
- 1 beaten egg
- 1 cup of breadcrumbs
- 1 Schnitzel Veal, Pork, Beef, Lamb or Chicken
Instructions
- Prepare the Schnitzel:
Before crumbing your Schnitzel, make sure it is prepared and ready to go.
This means it should be pounded thin, seasoned with salt and pepper. - Set up Your Crumbing Station:
To crumb your Schnitzel, you will need a crumbing station.
This should include three shallow dishes: one with flour, one with beaten eggs, and one with breadcrumbs. - Dip in Flour:
Take your prepared Schnitzel and dip it in the flour, making sure it is coated evenly.
Shake off any excess flour. - Dip in Egg:
Next, dip the Schnitzel in the beaten eggs, making sure it is coated evenly.
Let any excess egg drip off. - Coat in Breadcrumbs:
Finally, coat the Schnitzel in the breadcrumbs, making sure it is coated evenly.
Press the breadcrumbs onto the Schnitzel to ensure they stick. - Rest the Schnitzel:
For the perfect schnitzel, it's important to let the crumbed schnitzel rest in the fridge before cooking.
This allows the breadcrumbs to adhere to the meat and prevents them from falling off during cooking.
While a few minutes of rest time is sufficient, it's recommended to let it rest for at least 30 minutes for optimal results. - Cook the Schnitzel:
To cook your crumbed Schnitzel, heat a frypan with oil over medium-high heat.
Once the oil is hot, add the Schnitzel and cook for 2-3 minutes on each side, or until golden brown and cooked through. - Serve and Enjoy:
Once your Schnitzel is cooked, serve it hot with your favorite sides and enjoy!
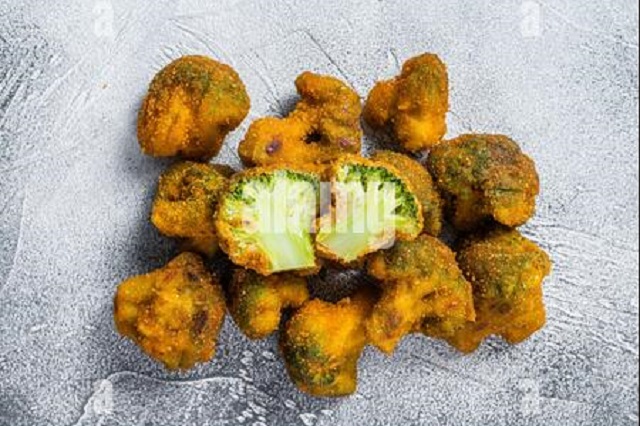
Step-by-Step: How to Crumb Vegetables Like a Pro
Ingredients
- ½ cup plain/all-purpose flour
- 1 beaten egg
- 1 cup of breadcrumbs
- Fresh vegetables
Instructions
- Choose your vegetables:
The first step in breading vegetables is to choose the right vegetables.
Some popular options include Asparagus Spears, zucchini, eggplant, Broccoli florets Mushrooms, and Cauliflower florets.
Make sure to choose vegetables that are firm and not too watery. - Prepare the breading station:
To bread vegetables, you will need a breading station.
This typically includes three bowls: one for flour, one for beaten eggs, and one for breadcrumbs.
You can also add seasonings to the breadcrumbs for added flavour. - Coat the vegetables in flour:
The first step in breading vegetables is to coat them in flour.
This helps the egg mixture stick to the vegetables.
Make sure to shake off any excess flour before moving on to the next step. - Dip the vegetables in beaten eggs:
Next, dip the vegetables in beaten eggs.
Make sure to fully coat the vegetables in the egg mixture. - Coat the vegetables in breadcrumbs:
Finally, coat the vegetables in breadcrumbs.
Make sure to fully coat the vegetables in the breadcrumbs, pressing them onto the vegetables to ensure they stick. - Fry or bake the vegetables:
Once the vegetables are breaded, you can either fry them in oil or bake them in the oven.
If If you are going to Fry them, make sure the oil is hot before adding the vegetables.
If baking, preheat the oven to 200°C (400°F) and bake for 20-25 minutes, or until the vegetables are golden brown and crispy. - Serve and enjoy!
Once the vegetables are cooked, serve them hot and enjoy! They make a great appetizer or side dish and can be served with a variety of dipping sauces.