Mastering the Art of Measuring Ingredients:
A Step-by-Step Guide
If you’ve ever found yourself in the kitchen, wondering how much of each ingredient to use, then this step-by-step guide is for you!
Mastering the art of measuring ingredients is crucial in cooking and baking, as it ensures precise measurements and ultimately delicious results.
Remember that precision is key when it comes to measuring ingredients.
Even small variations can affect the taste and texture of your final dish. So take your time, be meticulous with your measurements, and enjoy mastering this fundamental skill in the culinary world!
[lwptoc]
Introduction:
The Importance of Accurate Ingredient Measurements in Cooking and Baking
Hey there! Are you ready to take your cooking and baking skills to the next level?
In this section, I’m going to dive into the art of measuring ingredients. Trust me, it’s a game-changer when it comes to creating delicious and consistent dishes.
Accurate ingredient measurements are crucial in cooking and baking. They can make or break a recipe. Imagine adding too much salt or too little flour – disaster, right?
That’s why I am going to show you step-by-step how to master the art of measuring ingredients like a pro.
So grab your apron, get your measuring cups and spoons ready, and let’s get started on this culinary adventure together!
Step 1: Understanding Different Measurement Units and Conversions
Alright, let’s dive into the world of measurement units and conversions in the kitchen! Whether you’re a seasoned chef or just starting out, understanding how to convert between different units is essential for successful cooking and baking adventures.
First things first, we have two main systems of measurement: metric and imperial. In the metric system, we use grams (g) for weight and milliliters (ml) for volume. On the other hand, in the imperial system, we have ounces (oz) for weight and cups or fluid ounces (fl oz) for volume.
To make things even more interesting, when it comes to measuring ingredients in recipes, we often use kitchen-specific tools like measuring cups and spoons. These nifty little helpers come in various sizes and are designed to provide accurate measurements.
Understanding Cooking Measurement Abbreviations
Ever stared at a recipe riddled with cryptic abbreviations, feeling like you’ve stumbled into a secret chef’s code? Fear not, culinary adventurer!
My ultimate cooking measurements abbreviations chart is your decoder ring, unlocking the mysteries of tsps, tbsps, and kgs.
Standard Metric and Imperial Measurement Abbreviations.
| Abbreviation | Measurement | Usage Example |
|---|---|---|
| C, c | Cup | 1 cup flour |
| g | grams | 250 grams butter |
| kg, Kg, kilo | kilogram | 1 kg chicken breasts |
| mL, ml | millilitre | 5 ml vanilla essence |
| l | litre | 1 L beef stock |
| t, tsp | teaspoon | 1 tsp honey |
| T, Tbsp | tablespoon | 2 tbsp olive oil |
| cm | centimetre | Dice into 1 cm cubes |
| “, in | inch | Chop in to 2″ pieces |
| Oz | Ounce | 4 oz cream cheese |
| lb | Pound | 1 lb ground beef |
| fl. Oz | Fluid ounce | 16 fl oz bottle of water |
| qt | Quart | 1 qt milk |
| pt | Pint | 1 pt milk |
| gal | Gallon | 1 gal water |
Now that we’ve covered the basics, let’s move on to conversions.
Converting between metric and imperial units can be a bit tricky at first, but fear not!
With a little practice, you’ll become a conversion pro in no time.
So buckle up your apron strings and get ready to conquer those kitchen measurements like a boss!
Watch The Video Tutorial
If you want to skip reading the steps of measuring ingredients and jump straight in, then this video is what you need!
Step 2:
Using the Right Tools for Precise Measurements
Alright, let’s dive into step 2: Using the Right Tools for Precise Measurements.
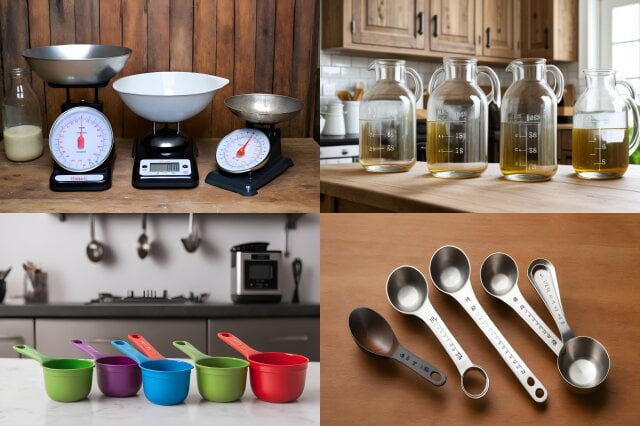
When it comes to cooking and baking, getting the measurements right is crucial for achieving that perfect dish. That’s where kitchen scales, measuring cups and spoons, liquid measuring cups, and digital kitchen scales come into play.
Kitchen scales are a handy tool that allows you to measure ingredients by weight rather than volume.
This is especially useful when it comes to ingredients like flour or sugar, where accuracy is key.
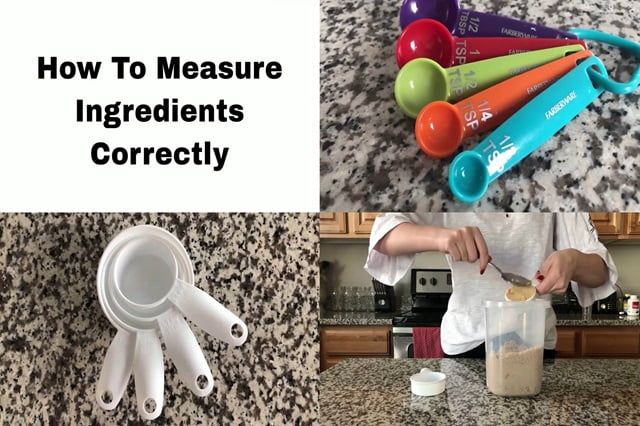
Measuring cups and spoons are another essential tool in any kitchen.
They allow you to measure both dry and liquid ingredients with ease.
When it comes to liquids, a liquid measuring cup is your best friend.
These cups have clear markings on the side that make it easy to measure the exact amount of liquid needed for your recipe.
And let’s not forget about digital kitchen scales – they take precision to a whole new level!
With their accurate readings, you can be confident that your measurements are spot on.
So remember, when it comes to cooking or baking, having the right tools like kitchen scales, measuring cups and spoons, liquid measuring cups, and digital kitchen scales will help you achieve those precise measurements needed for baking success!
Step 3:
Mastering Dry Ingredient Measurements
Alright, let’s dive into the world of dry ingredient measurements!
In this step, we’ll be focusing on mastering the art of measuring flour, sugar, salt, and cocoa powder.
- Flour:
- When it comes to flour measurement, it’s important to remember that different recipes may call for different methods.
Some may require you to spoon the flour into a measuring cup and level it off with a knife, while others may require you to lightly scoop the flour directly into the cup.
Make sure to follow your recipe’s instructions for accurate results.
- Sugar:
- Next up is sugar measurement. Similar to flour, you’ll want to ensure that you’re using the correct method based on your recipe.
For granulated sugar, spooning it into a measuring cup and leveling it off is usually the way to go.
However, if your recipe calls for brown sugar or powdered sugar, you might need to pack it firmly into the cup and then level it.
- Salt:
- When dealing with salt measurement, things are a bit simpler.
Most recipes will specify whether they require table salt or kosher salt.If using table salt, simply measure according to your recipe’s instructions.
If using kosher salt (which has larger crystals), you might need to use a bit more as its volume differs from table salt.
- Cocoa Powder:
- Lastly, let’s talk about cocoa powder measurement. This delightful ingredient adds rich flavour and depth to many recipes.
Similar to flour and sugar measurements, spooning cocoa powder into a measuring cup and leveling it off is generally recommended.
Remember that practice makes perfect when it comes to mastering dry ingredient measurements.
So grab those measuring cups and get ready for some delicious baking adventures!
Dry Measurements Conversion Chart
Conversions for the conversions of 5ml teaspoons to 15ml tablespoons, 20ml tablespoons, and 250ml cup measurements.
| Teaspoons (5ml) | Tablespoons (15ml) | Aussie Tablespoons (20ml) | Cups (250ml) |
|---|---|---|---|
| 1 Teaspoon | 1/3 | 1/4 | 1/50 |
| 2 Teaspoons | 2/3 | 1/2 | 1/25 |
| 3 Teaspoons | 1 | 3/4 | 1/16 |
| 6 Teaspoons | 2 | 1 1/2 | 1/8 |
| 12 Teaspoons | 4 | 3 | 1/4 |
| 24 Teaspoons | 8 | 6 | 1/2 |
| 36 Teaspoons | 12 | 9 | 3/4 |
| 48 Teaspoons | 16 | 12 | 1 |
Step 4:
Perfecting Liquid Ingredient Measurements
Now that we’ve covered the basics of liquid ingredient measurements, it’s time to dive into step 4: perfecting those measurements.
I’ll focus on four key ingredients: milk, water, oil, and honey.
- Milk:
- When it comes to measuring milk, it’s important to remember that not all measuring cups are created equal.
Use a liquid measuring cup specifically designed for liquids like milk.
Fill the cup to the appropriate line and make sure there are no air pockets or gaps. - Water:
- Water measurement, just like milk, is straightforward.
A standard measuring cup works just fine for water.Simply pour it into the cup until you reach the desired amount.
- Oil:
- When dealing with oil, things can get a little slippery (pun intended).
To ensure accuracy, use a measuring spoon or a kitchen scale for smaller quantities.If using a spoon, make sure to level off the excess oil for an accurate measurement.
Unfortunately not many recipes will give the weight of oil in the ingredient list. - Honey:
- Honey can be sticky and messy to measure, but fear not!
To make things easier, lightly coat your measuring spoon or cup with cooking spray or oil before pouring in the honey.This will help it slide right out without leaving behind any sticky residue.
Remember, practice makes perfect when it comes to liquid ingredient measurements. So don’t be afraid to experiment and find what works best for you in the kitchen!
Liquid Measurements Conversion Chart
This table shows the conversions of cups to millilitres (mL) and fluid Ounces (fl oz) liquid measurements.
| Cups | Millilitres (mL) | Fluid Ounces (fl oz) |
|---|---|---|
| ¼ cup | 60ml | 2 fl oz |
| ⅓ cup | 80ml | 2½ fl oz |
| ½ cup | 125ml | 4 fl oz |
| ⅔ cup | 160ml | 5 fl oz |
| ¾ cup | 180ml | 6 fl oz |
| 1 cup | 250 ml | 8 fl oz |
| 2 cups | 500ml | 16 fl oz |
| 2½ cups | 625ml | 20 fl oz |
| 4 cups | 1 litre | 32 fl oz |
Step 5:
Tips and Tricks for Ensuring Accuracy in Ingredient Measurements
Alright, let’s dive into some handy tips and tricks to ensure accuracy in ingredient measurements.
Trust me, getting those measurements spot on can make all the difference in your culinary creations!
-
If measuring flour, sift it first.
First things first, when it comes to measuring flour, it’s always a good idea to sift it before you start. This helps to remove any lumps and ensures that you’re getting a consistent measurement.
-
Level dry ingredients before measuring.
When measuring dry ingredients like sugar or flour, make sure to level them off with a straight edge knife or spatula.
It might seem like a small detail, but it can really affect the outcome of your recipe.
-
Measure liquids on a level surface.
Now let’s talk liquids. When measuring liquids like milk or water, always do so at eye level on a flat surface. Tilting your measuring cup can lead to inaccurate measurements, and we definitely don’t want that.
-
Read the recipe carefully.
Double-check the units of measurement (teaspoons vs. tablespoons, grams vs. ounces) used in the recipe.
-
Use the tare function on you kutchen scale.
If you’re using a kitchen scale for multiple ingredient measurements, take advantage of the tare function.
This nifty feature allows you to zero out the weight of your container so that you only measure the actual ingredient.
It saves time and makes things much more accurate.
So there you have it – some simple yet effective tips and tricks for ensuring accuracy in ingredient measurements. Happy cooking!
Conclusion:
Become a Pro at Measuring Ingredients Correctly for Delicious Results Every Time!
If you want to take your cooking skills to the next level, it’s essential to become a pro at measuring ingredients correctly.
By doing so, you can ensure that your dishes turn out delicious every time!
Accurate measurements are key when it comes to baking and cooking.
Whether it’s a pinch of salt or a cup of flour, getting the quantities right can make all the difference in achieving the perfect taste and texture.
Not only does understanding the cooking measurement abbreviations and measuring ingredients correctly improve the overall quality of your dishes, but it also allows for consistency in your recipes.
This means that you can recreate your culinary masterpieces time and time again with confidence.
To become a pro at measuring ingredients, start by investing in reliable measuring tools such as measuring cups, spoons, and kitchen scales.
Follow recipes closely and pay attention to specific instructions regarding measurements.
Remember that practice makes perfect! As you gain experience in the kitchen, you’ll develop an intuition for ingredient measurements and be able to adjust them according to your personal taste preferences.
So why wait? Start honing your ingredient-measuring skills today and unlock a world of delicious possibilities in your cooking adventures!
« Cooking Definitions