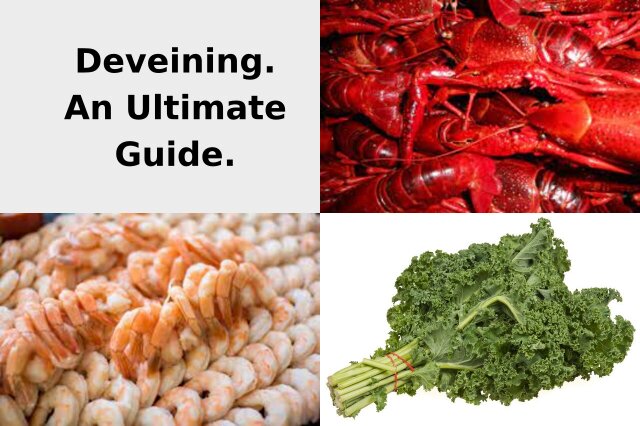
Devein shellfish, prawns, crayfish, crawfish, shrimp and vegetables with ease using this comprehensive guide!
Learn how to devein seafood and leafy greens in just a few simple steps, whether you’re a beginner or a seasoned pro.
Devein. A Comprehensive Guide to Deveining.
 Deveining is the process of removing the dark, vein-like intestine from the back of a shrimp, prawn, or other shellfish.
The vein is not harmful to eat, but some people find it unsightly or unpleasant.
Deveining can also improve the taste of seafood, as the vein can sometimes contain grit or impurities.
Deveining leafy greens refers to the process of removing the tough central vein or stem from the leaves.
This is typically done to improve the texture and taste of the greens.
There are a few different names for deveining. It is also sometimes referred to as “cleaning” or “preparing”, but is most commonly called “deveining.”
Why devein?
There are a few reasons why people choose to devein shrimp and other shellfish.
- Appearance:
Some people find the dark vein unsightly, especially when shrimp are served whole or in dishes where the shrimp are the main ingredient, such as shrimp cocktail.
Deveining can give shrimp a more uniform, appealing appearance. - Taste:
The vein can sometimes contain grit or impurities, which can give seafood a slightly unpleasant taste.
Deveining can help to remove these impurities and improve the overall taste of the seafood. - Texture:
The vein can sometimes add a slightly tough or chewy texture to seafood.
Deveining can help to remove the vein and improve the texture of the seafood.
What foods can be deveined?
Deveining foods can enhance their appearance, texture, and overall dining experience.
Whether you are a seafood lover or enjoy cooking various meats, knowing which foods can be deveined allows you to prepare them in the most appealing and delicious way possible.
It is important to note that deveining is not always necessary. In some cases, the vein is very small and does not affect the taste or appearance of the food.
However, in other cases, the vein can be large or dark, and removing it can improve the overall quality of the food.
Ultimately, the decision of whether or not to devein a food is a matter of personal preference.
If you are concerned about the taste or appearance of the vein, then you may want to devein the food.
However, if you do not mind the vein, then you can leave it in.
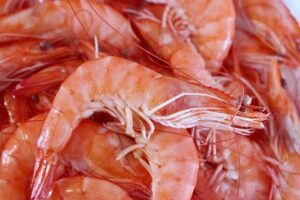
Shrimp.
The vein in shrimp is actually its digestive tract, and removing it not only improves the appearance of the shrimp but also eliminates any potential grittiness or unpleasant taste.
How to devein Shrimp.
Deveining shrimp may seem like a daunting task, but with a little practice, it becomes quick and easy.
By following these steps, you can ensure that your shrimp are clean and ready to be cooked in your favorite recipes.
- Gather your supplies.
Before you begin deveining shrimp, make sure you have all the necessary supplies.
You will need a sharp knife, a cutting board, a bowl of cold water, and a paper towel. - Prepare the shrimp.
Start by rinsing the shrimp under cold water to remove any dirt or debris.
Pat them dry with a paper towel to ensure a clean working surface. - Locate the vein.
Flip the shrimp over so that the curved side is facing up.
Look for a dark line running along the back of the shrimp.
This is the vein that you will be removing. - Make a shallow cut.
Using a sharp knife, make a shallow cut along the length of the shrimp, following the line of the vein.
Be careful not to cut too deep, as you don’t want to slice the shrimp in half. - Remove the vein.
Once you have made the cut, you can use the tip of the knife or your fingers to gently lift and remove the vein.
It should come out easily, but you may need to rinse the shrimp under cold water to ensure it is completely clean. - Rinse and pat dry.
After removing the vein, give the shrimp a final rinse under cold water to remove any remaining debris.
Pat them dry with a paper towel before cooking. - Optional: Butterfly the shrimp.
If you prefer butterflied shrimp, you can make a deeper cut along the back of the shrimp, almost cutting it in half.
This will allow the shrimp to open up like a butterfly when cooked.
Prawns:
Deveining prawns is especially important if you prefer to eat them with the shell on, as it can be unsightly and affect the overall dining experience.
How to devein Prawns
Deveining prawns may seem like a daunting task, but with a little practice, it becomes easier and quicker.
By following these steps, you can ensure that your prawns are clean and ready to be enjoyed in your favorite recipes.
- Gather your supplies.
Before you start deveining prawns, make sure you have all the necessary supplies.
You will need a sharp knife, a cutting board, a bowl of cold water, and a paper towel. - Remove the shell.
Start by removing the shell from the prawn.
Hold the prawn firmly and gently twist off the head.
Then, peel off the shell starting from the legs and working your way down to the tail.
Keep the tail intact if desired for presentation purposes. - Make a shallow cut.
Using a sharp knife, make a shallow cut along the back of the prawn.
Be careful not to cut too deep as you want to avoid damaging the flesh. - Remove the vein.
Once you have made the cut, you will see a dark vein running along the back of the prawn.
This is the digestive tract and needs to be removed.Use the tip of your knife or your fingers to lift and pull out the vein.
If it breaks, simply rinse the prawn under cold water to remove any remaining pieces. - Rinse and pat dry.
After deveining the prawn, rinse it under cold water to remove any residue.
Then, gently pat it dry with a paper towel.
This step is important to ensure the prawns are clean and ready to be cooked. - Repeat the process.
Continue deveining the rest of the prawns using the same technique.
Take your time and be careful not to rush, as it can be a delicate process. - Dispose of the waste.
Once you have finished deveining all the prawns, dispose of the shells and veins properly.You can either discard them in the trash or use them for making seafood stock.
Crayfish and Lobster:
How to devein Crayfish and Lobster.
Deveining crayfish or lobster may seem like a daunting task, but with the right tools and technique, it can be easily accomplished.
By following these steps, you’ll be able to enjoy a delicious and deveined crayfish or lobster dish with confidence.
- Gather your supplies.
Before you begin deveining crayfish or lobster, make sure you have all the necessary supplies. You will need a sharp knife, a pair of kitchen shears, and a clean cutting board.
It’s also a good idea to have a bowl of cold water nearby to rinse the crayfish or lobster after deveining. - Prepare the crayfish or lobster.
If you’re working with live crayfish or lobster, it’s important to handle them carefully.
Make sure they are properly chilled or sedated to minimize their movement.If you’re using frozen crayfish or lobster, thaw them in the refrigerator overnight before starting the deveining process.
- Locate the digestive tract.
The digestive tract of a crayfish or lobster runs along the length of its body.
It is a dark-coloured tube that can be easily seen through the translucent shell.
To locate it, gently flip the crayfish or lobster onto its back. - Remove the digestive tract.
Using the sharp knife or kitchen shears, carefully cut along the length of the crayfish or lobster’s body, following the path of the digestive tract.
Be cautious not to cut too deeply, as you don’t want to damage the meat.Once the cut is made, you can use the tip of the knife or your fingers to gently pull out the digestive tract.
- Rinse and clean.
After removing the digestive tract, rinse the crayfish or lobster under cold water to remove any remaining debris.
This step is important to ensure that the meat is clean and ready to be cooked. - Cook and enjoy.
Now that your crayfish or lobster is deveined, you can proceed with your chosen recipe.Whether you’re grilling, boiling, or sautéing, the deveined crayfish or lobster will be ready to cook and enjoy.
- Practice proper food safety.
When working with seafood, it’s crucial to practice proper food safety measures.
Make sure to wash your hands thoroughly before and after handling the crayfish or lobster.
Additionally, clean all utensils and surfaces that come into contact with the seafood to prevent cross-contamination.
Crawfish:
Removing the vein ensures that you have a cleaner and more enjoyable eating experience.
How to devein Crawfish.
Deveining crawfish may take some practice, but with time, you’ll become more efficient at it.
Remember to take your time and be careful when handling the sharp knife. Enjoy your delicious, deveined crawfish!
- Gather your supplies.
Before you begin deveining crawfish, make sure you have all the necessary supplies.
You will need a large pot for boiling the crawfish, a strainer or colander, a sharp knife, and a clean work surface. - Boil the crawfish.
Fill the pot with water and bring it to a boil.
Add your preferred seasonings, such as Cajun spices, garlic, and onions, to enhance the flavour of the crawfish.Once the water is boiling, carefully add the crawfish and let them cook for about 5-7 minutes, or until they turn bright red.
- Drain the crawfish.
Using a strainer or colander, carefully remove the crawfish from the boiling water and drain them.Allow them to cool down slightly before handling.
- Remove the head.
Hold the crawfish firmly by the tail and twist the head off.
Set the head aside, as it can be used for making stock or discarded. - Peel the shell.
Starting from the top of the crawfish, gently peel back the shell, working your way down to the tail.
Be careful not to remove the tail meat while peeling. - Locate the vein.
Once the shell is peeled, you will see a dark vein running along the back of the tail.
This vein is the digestive tract and should be removed. - Devein the crawfish.
Using a sharp knife, make a shallow cut along the length of the vein.
Be careful not to cut too deep, as you don’t want to remove the meat. Gently lift the vein out of the tail and discard it. - Rinse the tail.
After deveining, rinse the tail under cold water to remove any remaining debris or residue. - Repeat the process.
Continue peeling and deveining the remaining crawfish using the same method. - Enjoy your deveined crawfish.
Once all the crawfish have been deveined, they are ready to be enjoyed.
Serve them hot with your favourite dipping sauces, such as drawn butter sauce or seafood cocktail sauce.
Chicken:
The vein in chicken is actually a blood vessel that runs along the breastbone.
While it is not harmful to consume, some people prefer to remove it for aesthetic reasons or to ensure a more tender texture.
How to devein chicken.
Remember, deveining chicken is an optional step and not necessary for every recipe.
However, if you prefer a cleaner and more visually appealing chicken breast, taking the time to devein can make a difference.
- Gather your supplies.
Before you begin, make sure you have all the necessary supplies.
You will need a sharp knife, a cutting board, and a bowl or plate to collect the veins. - Start with a fresh chicken.
It’s important to start with a fresh chicken that has not been frozen.
This will make the process easier and ensure that the veins are easier to remove. - Remove the skin.
To devein a chicken, it’s best to start by removing the skin.
This will make it easier to see and access the veins. - Locate the veins.
Once the skin is removed, you will be able to see the veins more clearly.Look for the thin, blueish-green veins that run along the length of the chicken breast.
- Make a small incision.
Using a sharp knife, make a small incision along the length of the vein.
Be careful not to cut too deep, as you don’t want to remove any meat. - Gently pull out the vein.
Using your fingers or a pair of tweezers, gently pull out the vein from the incision.
Be careful not to tear the meat or damage the surrounding tissue. - Repeat the process.
Continue to locate and remove the veins from the rest of the chicken breast.
Take your time and be thorough to ensure that all veins are removed. - Rinse the chicken.
Once all the veins have been removed, rinse the chicken breast under cold water to remove any remaining debris or blood. - Pat dry and cook as desired.
After rinsing, pat the chicken breast dry with a paper towel.
You can now cook the chicken as desired, knowing that it is deveined and ready to be enjoyed. - Practice makes perfect.
Deveining chicken can be a bit tricky at first, but with practice, you will become more skilled and efficient.
Don’t get discouraged if it takes a few tries to get the hang of it.
Beef:
This is often done to improve the tenderness and texture of the meat, as well as to remove any potential gristle.
How to devein Beef.
Deveining beef can be a time-consuming process, but it is worth the effort to ensure a more tender and enjoyable eating experience. With the right tools and technique, you can easily devein beef and elevate your cooking skills.
- Start with a sharp knife.
Having a sharp knife is essential when deveining beef.
A dull knife can make the process more difficult and increase the risk of accidents.
Make sure to sharpen your knife before starting. - Choose the right cut of beef.
Not all cuts of beef require deveining.
It is typically necessary for tougher cuts of meat, such as flank steak or skirt steak, where the veins can be tough and chewy.
So, choose the appropriate cut of beef for deveining. - Locate the veins.
Inspect the meat and look for the veins.
They are usually visible as thin, white or silver-coloured lines running through the meat.
The veins can be found in different areas, depending on the cut of beef. - Make a shallow incision.
Using your sharp knife, make a shallow incision along the length of the vein.
Be careful not to cut too deep into the meat, as you want to remove the vein without removing too much of the surrounding meat. - Gently lift the vein.
Once you have made the incision, use your fingers or the tip of your knife to gently lift the vein from the surrounding meat.
Be patient and take your time to avoid tearing the meat or leaving any pieces of the vein behind. - Pull out the vein.
Once the vein is lifted, use your fingers or a pair of kitchen tweezers to firmly grip the vein and pull it out in one smooth motion.
Make sure to remove the entire vein, including any smaller branches that may be attached. - Trim any remaining connective tissue.
After removing the vein, inspect the meat for any remaining connective tissue or tough membranes.Use your knife to carefully trim away any excess tissue, ensuring that the meat is clean and ready for cooking.
Fish:
While it is not harmful to consume, removing the vein can improve the appearance and taste of the fish.
How to devein Fish.
Deveining fish may seem like a daunting task, but with the right tools and technique, it can be easily accomplished. By following these steps, you’ll be able to prepare your fish for cooking, ensuring a delicious and enjoyable meal.
- Gather your tools.
Before you start deveining fish, make sure you have all the necessary tools. You will need a sharp knife, a cutting board, and a pair of kitchen shears. - Choose the right fish.
Not all fish need to be deveined, so it’s important to choose the right type of fish.
Generally, larger fish like salmon and trout do not require deveining, while smaller fish like tilapia and catfish may have a visible vein that needs to be removed. - Prepare the fish.
Start by rinsing the fish under cold water to remove any dirt or debris.
Pat it dry with a paper towel and place it on a clean cutting board. - Locate the vein.
The vein in fish is usually located along the spine, running from the head to the tail.
It may appear as a dark line or a bulging vein. - Make an incision.
Using a sharp knife, make a shallow incision along the length of the fish, following the line of the vein.
Be careful not to cut too deep, as you don’t want to damage the flesh of the fish. - Remove the vein.
Once you have made the incision, use the kitchen shears to carefully lift and remove the vein.
Gently pull it out, making sure to remove the entire length of the vein. - Rinse and clean.
After removing the vein, rinse the fish under cold water to remove any remaining debris.
Pat it dry with a paper towel before cooking or storing. - Cook or store the fish.
Now that your fish is deveined, you can proceed with your chosen cooking method. Whether you’re poaching, grilling, baking, or frying, the fish will be ready to cook.
If you’re not cooking it immediately, make sure to store it properly in the refrigerator to maintain freshness.
Leafy Greens:
Removing the stems not only makes the greens more tender and easier to eat, but it also helps to evenly cook them.
How to devein Leafy Greens.
Deveining leafy greens can be a tedious task, but it’s worth the effort for a more enjoyable eating experience.
By following these steps, you’ll be able to remove the tough veins and fully enjoy the flavour and texture of your leafy greens.
- Gather your leafy greens.
Start by selecting the leafy greens you want to devein.
This can include spinach, kale, collard greens, Swiss chard, and any other greens you enjoy. - Rinse the greens.
Before deveining, it’s important to rinse the greens thoroughly to remove any dirt or debris.Fill a large bowl with cold water and gently swish the greens around.
Drain the water and repeat this process until the water runs clear. - Remove the stem.
Hold the leafy green by the stem and use a sharp knife or your fingers to carefully remove the stem.
This is the thick, fibrous part that runs down the centre of the leaf. - Fold the leaf in half.
Fold the leaf in half lengthwise, with the vein side facing outwards.
This will make it easier to see and remove the vein. - Devein the leaf.
Using a sharp knife or your fingers, carefully cut or pull out the vein from the leaf.
Start at the base of the leaf and work your way up towards the tip. Be gentle to avoid tearing the leaf. - Repeat for remaining leaves.
Continue folding and deveining the rest of the leaves until all the greens are deveined.
Take your time and be patient, as this process can be a bit time-consuming. - Use the deveined greens.
Once the greens are deveined, they are ready to be used in your favourite recipes.
Whether you’re making a salad, sautéing them, or adding them to a smoothie, the deveined greens will be easier to chew and have a more pleasant texture.
Oysters:
Although oysters do not need to be deveined.
The dark line that you may see in an oyster is actually its digestive tract, which is completely edible.
Some people prefer to remove it for aesthetic reasons, but it is not necessary.
How to devein Oysters.
Learn the step-by-step process of deveining oysters with this easy-to-follow guide. Say goodbye to gritty oysters and enjoy their deliciousness!
- Gather your supplies.
To devein oysters, you will need a few essential tools.
These include a sturdy oyster knife, a cutting board, a towel or glove for protection, and a bowl or container to collect the oyster meat. - Prepare the oysters.
Before you begin deveining, make sure to clean the oysters thoroughly.
Scrub the shells with a brush under cold running water to remove any dirt or debris.This step is important to prevent any contamination during the deveining process.
- Secure the oyster.
Hold the oyster firmly with a towel or glove to protect your hand.
Place it on the cutting board with the hinge facing towards you.
This will make it easier to open the oyster shell. - Open the oyster.
Using the oyster knife, insert the tip into the hinge of the oyster.
Apply gentle pressure and twist the knife to pry the shell open.Be careful not to force it too much to avoid damaging the oyster meat.
- Cut the muscle.
Once the oyster shell is open, locate the muscle that connects the oyster to the shell.
This is the part that needs to be deveined.Carefully slide the knife underneath the muscle and cut it to detach it from the shell.
- Remove the vein.
After cutting the muscle, you will notice a dark, slimy vein running along the oyster.
This is the digestive tract and is what you want to remove.Use the knife or your fingers to gently lift and pull out the vein from the oyster.
Be sure to discard it properly. - Rinse and inspect.
Once you have deveined the oyster, rinse it under cold water to remove any remaining debris or slime.Take a moment to inspect the oyster for any additional veins or impurities.
If you find any, repeat the deveining process. - Repeat the process.
Continue opening and deveining the rest of the oysters using the same technique.
Take your time and be careful not to injure yourself with the oyster knife. - Enjoy your deveined oysters.
Now that you have successfully deveined your oysters, they are ready to be enjoyed.
Serve them raw on the half shell, or use them in your favourite oyster recipes such as oyster stew, grilled oysters, or oyster Rockefeller.
Squid:
Squid do need to be deveined before cooking.
The dark, slimy vein that runs along the body of the squid should be removed as it can be tough and unpleasant to eat.
How to devein Squid.
Want to know the secret to perfectly cleaned squid? This guide will teach you how to devein squid like a pro, ensuring a delicious and visually appealing dish every time.
- Gather your ingredients and tools.
Before you start deveining squid, make sure you have all the necessary ingredients and tools.
You will need fresh squid, a sharp knife, a cutting board, and a bowl of water. - Remove the head and tentacles.
Start by removing the head of the squid by cutting just below the eyes.Set the head aside for other uses if desired.
Next, remove the tentacles by gently pulling them away from the body. - Separate the body from the fins.
Hold the squid body in one hand and use your other hand to pull the fins away from the body.
They should easily come off with a gentle tug. - Peel off the skin.
With the body of the squid in your hand, use your fingers or a knife to peel off the skin.
Start at the top and work your way down, removing the thin, transparent layer. - Locate the quill.
The quill is a long, translucent piece of cartilage that runs along the length of the squid’s body.
It can be easily seen and felt as a firm, flexible strip. - Remove the quill.
Using your fingers or a knife, gently pull or cut the quill out of the squid’s body.
Be careful not to damage the surrounding flesh. - Rinse and clean.
Once the quill is removed, rinse the squid under cold water to remove any remaining debris.You can also use your fingers to gently rub the inside of the squid to ensure it is clean.
- Cut into desired pieces.
Now that the squid is deveined and cleaned, you can cut it into the desired pieces for cooking.
Common cuts include rings or strips, depending on your recipe. - Store or cook immediately.
If you’re not cooking the squid right away, store it in an airtight container in the refrigerator.
It is best to use it within a day or two for optimal freshness. - Enjoy your delicious squid dish!
Now that you know how to devein squid, you can confidently prepare a variety of delicious dishes such as calamari, stir-fries, or grilled squid.
Enjoy your culinary creation!
Clams:
It is not necessary to devein clams. The dark vein-like structure that you may see in clams is actually the digestive tract, and it is safe to eat.
However, some people prefer to remove it for aesthetic reasons or personal preference.
How to devein Clams.
Learn the step-by-step process of deveining clams with this easy-to-follow guide.
Say goodbye to gritty clams and enjoy a delicious meal!
- Gather your supplies.
Before you start deveining clams, make sure you have all the necessary supplies.
You will need a sharp knife, a cutting board, a bowl of cold water, and a colander. - Clean the clams.
Before deveining, it’s important to clean the clams thoroughly.
Rinse them under cold water to remove any dirt or sand.
You can also scrub them gently with a brush to ensure they are clean. - Inspect the clams.
Take a close look at each clam and check for any visible signs of damage or open shells.
Discard any clams that are cracked, broken, or do not close when tapped. - Find the hinge.
Hold the clam with the hinge facing towards you.
The hinge is the point where the two shells meet.This is where you will start the deveining process.
- Insert the knife.
Using a sharp knife, carefully insert the tip into the hinge of the clam.
Gently twist the knife to pry the shells apart.Be cautious not to apply too much pressure, as you don’t want to damage the clam meat.
- Cut the muscle.
Once the shells are slightly separated, locate the dark, rubbery membrane attached to the clam meat.
This is the vein that you want to remove.Carefully slide the knife between the membrane and the shell, cutting the muscle that holds it in place.
- Remove the vein.
Gently pull the vein out of the clam using your fingers or the knife.
It should come out easily, but if it doesn’t, you can use the knife to scrape it away from the clam meat. - Rinse the clams.
After deveining each clam, rinse it under cold water to remove any remaining debris or sand.
This will ensure that your clams are clean and ready to be cooked. - Repeat the process.
Continue deveining each clam until you have gone through the entire batch.
Take your time and be careful not to damage the clam meat. - Cook and enjoy.
Now that your clams are deveined, you can cook them according to your desired recipe.
Whether you’re making clam chowder, pasta with clams, or simply steaming them, you can now enjoy your delicious and clean clams without the unwanted veins.
Mussels:
Deveining mussels is a personal preference.
Some people choose to devein mussels to remove any sand or grit that may be present, while others believe that it is unnecessary.
Ultimately, it is up to you to decide whether or not to devein your mussels based on your own preferences and comfort level.
How to devein Mussels.
Deveining mussels may seem like a tedious task, but it is essential for ensuring a clean and enjoyable eating experience.
By following these steps, you can easily devein mussels and create a delicious and sustainable seafood dish.
- Gather your ingredients and tools.
Before you start deveining mussels, make sure you have all the necessary ingredients and tools.
You will need fresh mussels, a sharp knife, a small spoon or butter knife, and a bowl of cold water. - Clean the mussels.
Before deveining, it’s important to clean the mussels thoroughly.Rinse them under cold water and scrub off any dirt or debris on the shells.
Discard any mussels that are cracked or open and do not close when tapped. - Remove the beard.
The beard is the fibrous strand that protrudes from the mussel shell.
To remove it, hold the mussel firmly in one hand and use your other hand to grip the beard.
Give it a firm tug towards the hinge of the shell.If it doesn’t come off easily, you can use a small spoon or butter knife to scrape it off.
- Locate the vein.
After removing the beard, inspect the mussel to locate the vein.
The vein is a dark, thread-like strand that runs along the edge of the mussel meat.
It can be easier to see if you hold the mussel up to a light source. - Remove the vein.
Using a sharp knife, carefully cut along the edge of the mussel where the vein is located.Make a shallow incision and gently lift the vein out with the tip of the knife or a small spoon.
Be careful not to cut too deep into the mussel meat. - Rinse and repeat.
After removing the vein, rinse the mussel under cold water to ensure all debris is removed.
Repeat the process for each mussel until they are all deveined. - Cook and enjoy.
Once you have deveined all the mussels, they are ready to be cooked and enjoyed in your favourite recipe.Whether you’re making a classic moules marinière or a spicy Thai curry, your deveined mussels will be clean and ready to add delicious flavour to your dish.
Scallops:
The small black vein, also known as the “mud vein,” is the digestive tract of the scallop and can be removed if desired.
However, it does not affect the taste or texture of the scallop.
How to devein Scallops.
Deveining scallops may seem like a tedious task, but it’s well worth the effort for a more enjoyable dining experience.
With these simple steps, you can easily devein scallops at home and elevate your seafood dishes to the next level.
- Start with fresh scallops.
It’s important to begin with fresh scallops to ensure the best flavour and texture.
Look for scallops that are firm and have a sweet, oceanic smell. - Remove the side muscle.
Scallops have a small side muscle that needs to be removed before deveining.
This muscle can be tough and chewy, so it’s best to remove it for a more enjoyable eating experience.
Simply grasp the muscle with your fingers and pull it away from the scallop. - Locate the vein.
The vein in a scallop is a dark, thin line that runs along the side of the scallop.
It can be easily seen and felt with your fingers. - Use a small knife or scallop tool.
To devein the scallop, use a small knife or a scallop tool.
Gently insert the knife or tool under the vein and lift it up.
Be careful not to cut too deeply into the scallop, as you want to remove the vein without damaging the flesh. - Pull out the vein.
Once you have lifted the vein with the knife or tool, use your fingers or a pair of tweezers to pull it out completely.
The vein should come out easily, leaving behind a clean scallop. - Rinse the scallops.
After deveining, rinse the scallops under cold water to remove any remaining debris or residue.
Pat them dry with a paper towel before cooking. - Cook and enjoy.
Now that your scallops are deveined, you can cook them according to your favourite recipe.
Whether you’re searing them, grilling them, or adding them to a pasta dish, you can now enjoy scallops that are free from the tough side muscle and the unappetizing vein.