
Create fluffy, and moist scones with crisp crumbly edges using this easy scones recipe.
Learn how to make fluffy scones without eggs with this 4 ingredient recipe.
Traditional scones are fairly plain on their own, but are classically eaten with jam and whipped cream, making for a real treat.
They also make a perfect side dish to go alongside a main meal of soups, stews and casseroles.
Or maybe you’re looking for a sweeter scone such as lemonade scone using only 3 ingredients.
This 4 ingredient cheese scone recipe is also a winner.
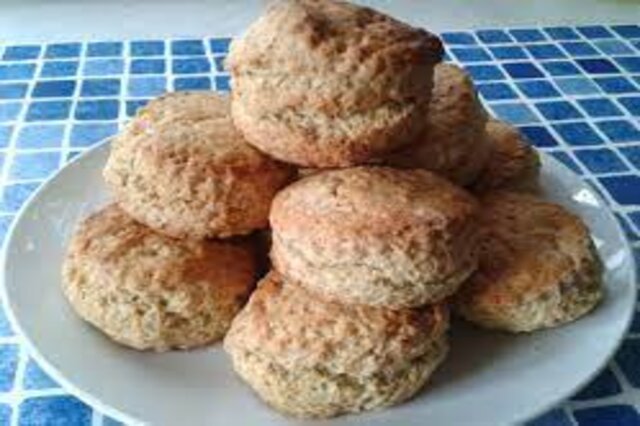
Easy Scones Recipe for Delicious Results
Elevate your baking skills with our traditional scone recipe. Learn how to make delicious scones effortlessly. Delight your taste buds with every bite.
Equipment
- Oven
- Baking tray
- Large bowl
- Cutting board
- Sharp knife
- Pastry brush
Ingredients
- 3 Cups self raising flour
- 75 grams cold butter
- 1½ Cups milk
- ¼ tsp salt
- extra flour
- extra milk
Instructions
- Preheat your oven to 220℃ (425℉)
- Lightly dust a large baking tray with extra flour.
- Add your 3 Cups self raising flour and ¼ tsp salt to a bowl.
- Chop up the 75 grams cold butter into small pieces, toss them into the flour and rub the pieces into the flour by pressing them between your fingertips.
- Do this until it resembles fine breadcrumbs.
- Make a well in the centre. Add 1½ Cups milk and quickly mix to a soft dough using a knife.
- Knead 2 to 3 times.
- Push the dough down into a 2.5 cm (1 inch) high square.
- Using a lightly floured knife to cut into 12 even size pieces, wiping off and flouring the knife with the extra flour between each cut.
- Place the scones on the baking tray, nestling them up against one another.
- Brush tops with a little extra milk, then bake for 12-15 minutes.
- The scones are ready when they feel firm when squeezed in the middle.
Notes
Tips for Perfect Scones
- The key to making perfect scones is working quickly, so that the butter doesn't soften too much.
So don't soften your butter. - Always use butter straight from the fridge and use chilled milk as well.
Cold butter and milk helps to make the scones rise higher. - If it's hot in your kitchen, freeze your butter before making scones.
- If you have a food processor process the flour, sugar, salt and cold butter until the mixture resembles breadcrumbs.
- Use a round-ended table knife to stir in the milk and water.
- Arrange your scones side by side on your baking tray, just touching one another, helps in making the scones rise evenly, and higher.
The heat causes the scones to rise. If they are placed side by side, the scones will be forced to rise upwards, not outwards.
Ingredient Substitutions
- Plain flour instead of self-raising flour.
- Substitute self raising flour with 3 cups plain flour (all-purpose flour) and 3½ tsp baking powder.
- Use yoghurt in place of milk.
- I sometimes use a mixture of water and natural yoghurt (50ml of each) in place of milk.
It depends on what I have in the fridge and what flavour I’m going for (yoghurt adds a bit more of a tangy flavour to the scones). - Dairy-Free Scones
- Use a dairy free block butter instead of the butter and use a dairy-free milk like oat milk.
Serving Suggestions
- Serve with jam and a dollop of whipped cream.
- These always go down well as a side dish with casseroles, soups &
stews. - We often have these scones with Ki Si Min as a main meal.
Very easy to make and delicious to eat. We had them hot buttered with your kai si ming recipe
I must say that this article on making scones covers everything you need to know. Thank you and keep up the good work.